Feeding Setup
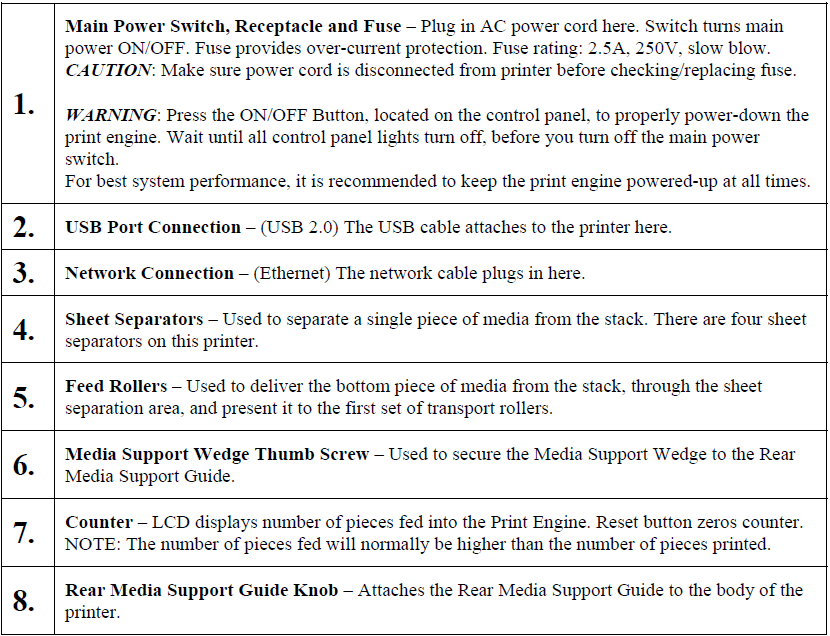
Setting up the Feed
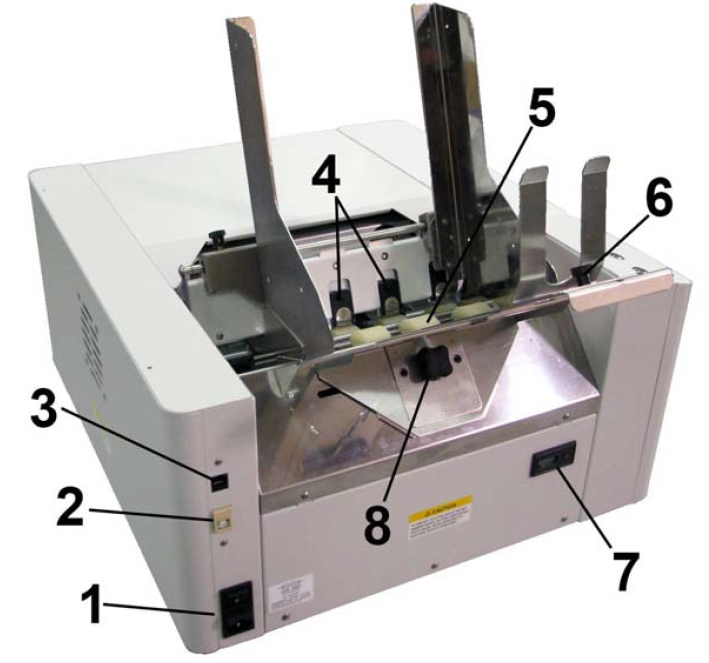
The Digital Color Printer is equipped with four sheet separators, two side guides, a rear media support guide and two different sized media support wedges. When properly adjusted these items will separate and guide the media so that only one piece of media is fed into the print engine at a time.
1. If not already present; install the appropriate Media Support Wedge onto the Rear Media Support Guide, using the mounting hardware [4] provided.
Wide Media Support Wedge – For media that is 8 to 9.5 inches wide.
Narrow Media Support Wedge – For media that is 3 to 8 inches wide.

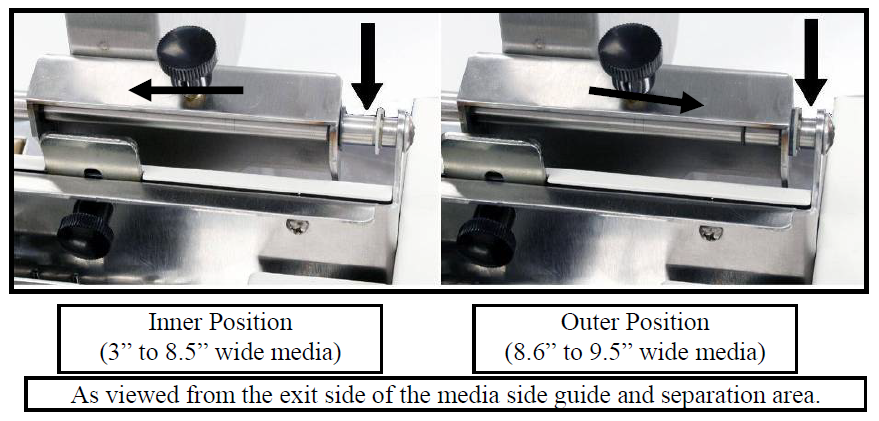
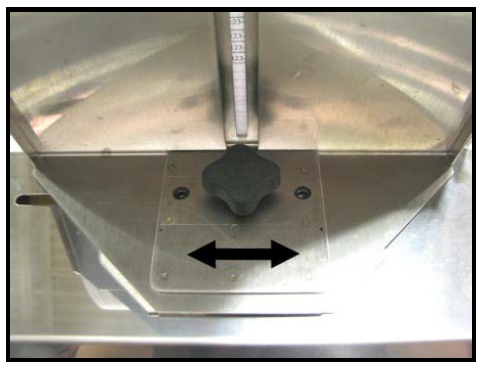
2. Select the appropriate position for the Media Registration Side Guide.
This guide has two positions.
- Inner position for media measuring 3” to 8.5” in width.
- Outer position for media measuring 8.6” to 9.5” in width.
Loosen the locking knob and move the Media Registration Side Guide into the desired position (Inner or Outer). Then tighten the locking knob to secure the guide.
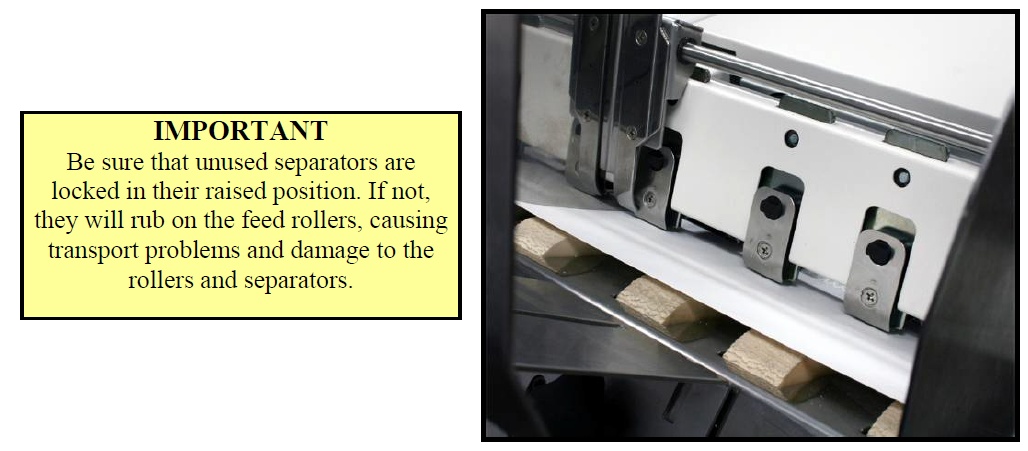
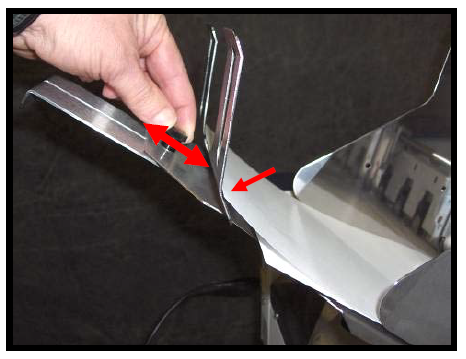
3. Loosen the locking screws, located behind the sheet separators, and raise the separators.
Then tighten the locking screws to hold the separators in the up position.

4. Place a single piece of the media, to be run, under the separators. Always place the media against the Media Registration Side Guide. |
5. Loosen the separator locking screw and allow the separator to settle onto the media. Then tighten the locking screw. Repeat for each sheet separator. |
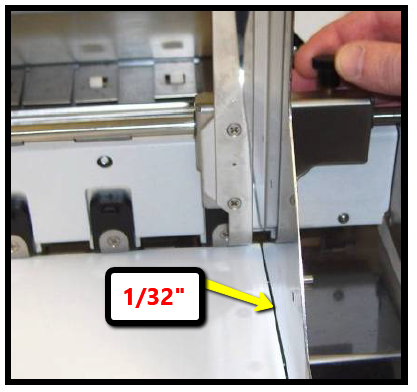
6. Loosen the locking knob and reposition the Adjustable Media Side Guide so that it is about 1/32-inch from the side of the media.
Then tighten the locking knob to secure the side guide.
Tip: If you have trouble moving the Adjustable Media Side Guide closer to the non-operators side of the printer, check to be sure the Rear Media Support Guide is not getting in your way.
7. Adjust the position of the Rear Media Support Guide, so that it is centered under the width of your media. This guide slides side to side.
Tip: The Rear Media Support will slide, without loosening the knob.
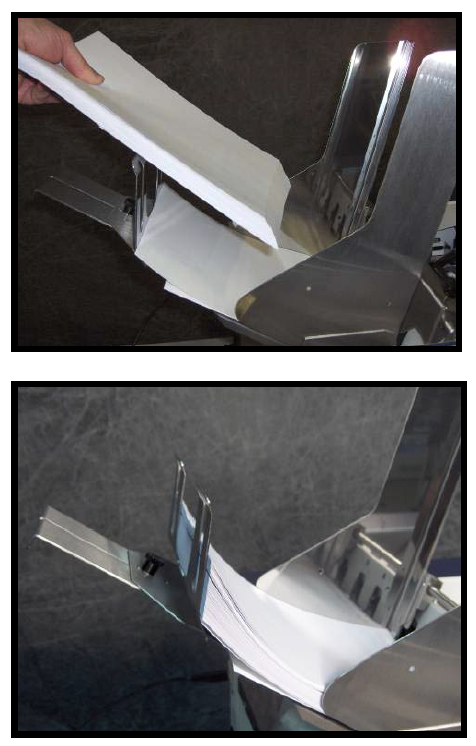
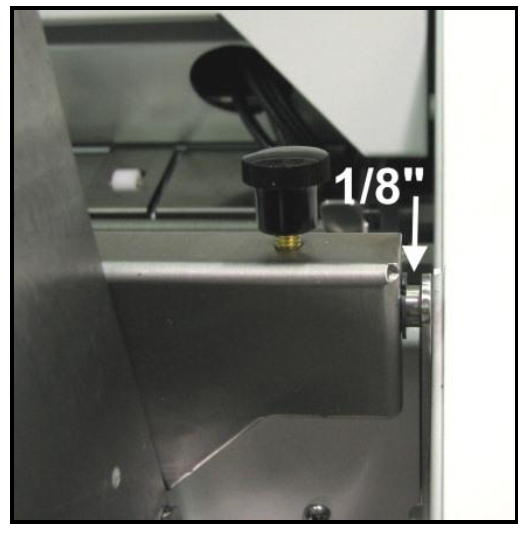
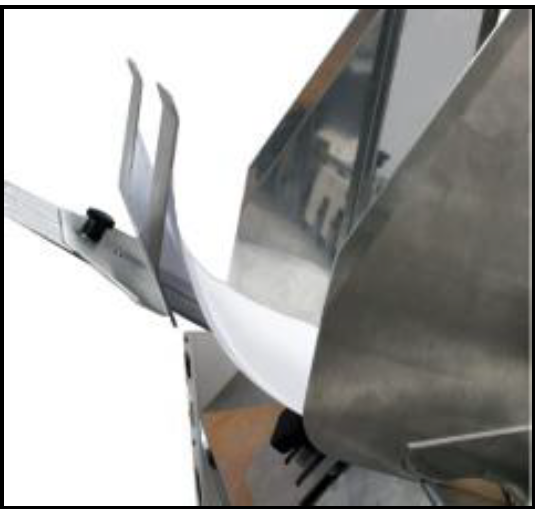
8. Adjust the position of the Media Support Wedge to accommodate the length of your media. Place a second piece of media onto the single piece that is already in the hopper. Make sure the second piece of media is against the separators. Loosen the locking screw and reposition the wedge so the trailing edge, of the second piece of media, is hitting the bend in the wedge or about a 1/2"; as shown
Approximately 2" above Feed Table for paper as shown.
|
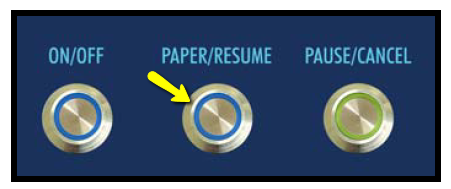
9. Place a stack of media into the hopper. Make sure that the stack is fanned so the bottom piece is closer to the separators then the top pieces. Tip: When loading an empty hopper. Place one piece of media so it is directly against the tips of the separators. Then place the fanned stack of media on top of this single piece. NOTE: The amount of media that can be stacked on the printer is determined by the weight of the material. The feed section may not feed larger and heavier media when the stack is full. If this is the case, reduce the amount of media in the stack until the media feeds properly. 10. Paper Feed Test. To check for proper media separation and feeding. Turn the printer’s Main Power Switch ON; then press the control panel’s ON/OFF button. Wait about 45 seconds for the print engine to power-up (ON/OFF button should illuminate). Press and hold the Paper button for 5 seconds. The printer will feed one piece of media through the printer. |