Cleaning Ink Tank Contacts & Prism
When reinstalling or replacing Ink Tanks; the Ink Level indicators, in the Toolbox, may show “?” or “Out” below one or more Ink Tank positions. - The “Out” condition may be due to a dirty Ink Tank Level Prism. - The “?” condition may be due to dirty QA Chip contacts.

NOTICE: These conditions can also be caused by improper Ink Tank removal or install.
If the printer is communicating with the Ink Tank at same time the Tank is being removed/installed;
this can corrupt the QA Chip on the Ink Tank, rendering it unusable.
You can clean the Ink Tank Contacts & Prism as follows:
| 1. Open the Printer’s Toolbox. | |
|
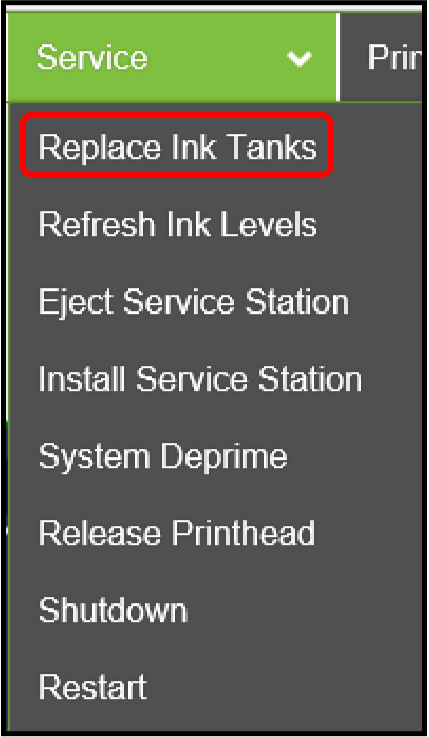
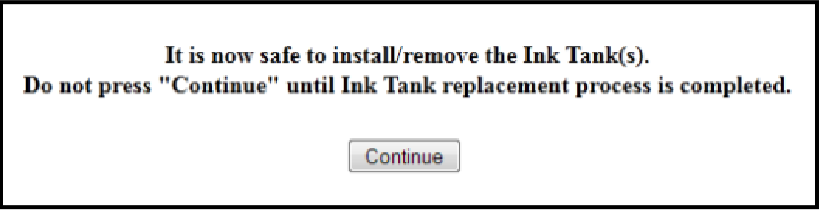
2. Remove Ink Tank(s). Open Toolbox. Select the “Service” drop-down menu, then select “Replace Ink Tanks”. Once the “Confirm” window opens, it is safe to remove Ink Tanks. IMPORTANT: DO NOT press “Continue” until after removing and replacing the Ink Tank(s) and closing the Ink Tank Latches. |
|
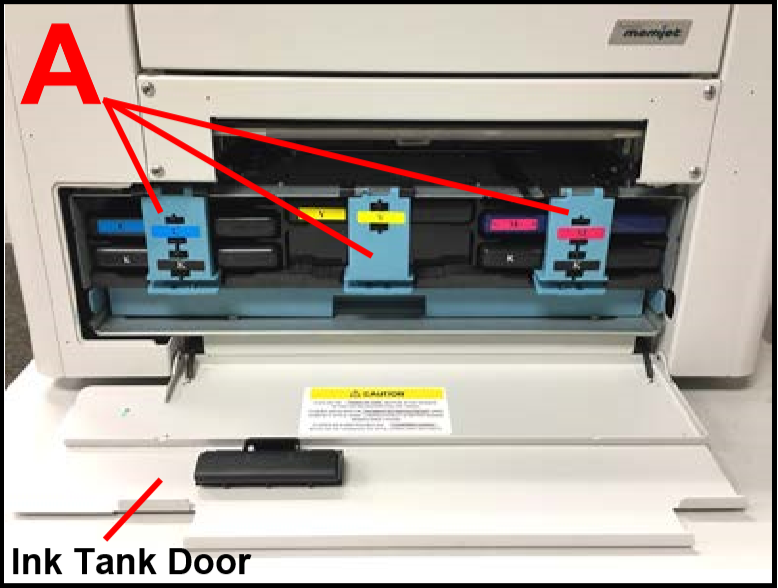
| 3. Open the Ink Tank Door (hinged at bottom). | |
| 4. Unlock the Ink Tank Securing Latch(es) [A] that correspond to the Ink Tank positions that are displaying “?” or “Out”. | |
| 5. Remove the corresponding Ink Tank(s) from the Printer. | |
|
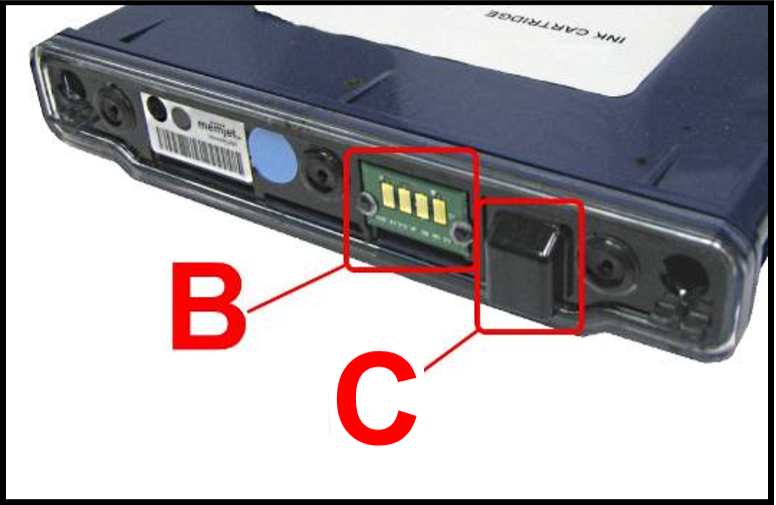
6. Clean the Ink Tank Level Prism [C] and QA Chip contacts [B] with a clean, dry, lint-free cloth. NOTE: You can dampen the cloth with distilled water to wipe the Prism, but do NOT get the QA Chip contacts wet. Tip: A soft pencil eraser can also be used to lightly clean the QA Chip contacts [B]. This can help remove corrosion that is not visible. Wipe the contacts off with a lint-free cloth after cleaning them with an eraser. |
|
|
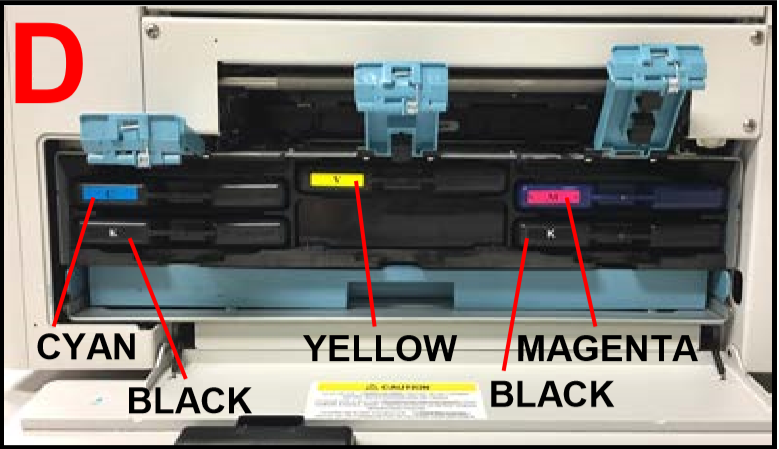
7. Re-install the Ink Tank(s) (label side up) into their appropriate color slots [D]. CAUTION! Be sure each Tank is installed into the proper color slot. If you force the Ink Tank into the wrong slot, you will contaminate the ink system and professional service will be required. INSTALLATION TIP: To help insure that the Ink Tanks are seat properly. Insert the Ink Tank into the appropriate Ink Station, then pull the Ink Tank back about an inch and push forward firmly. This will help insure that the “septum needles” penetrate the seals on the Ink Tanks. |
|
|
8. Close and lock all three Ink Tank Securing Latches. Make sure they are securely latched at the bottom. IMPORTANT: Make sure both sides of the Latch are engaged at the bottom | |
| 9. Click “Continue” on the “Confirmation” window. | |
|
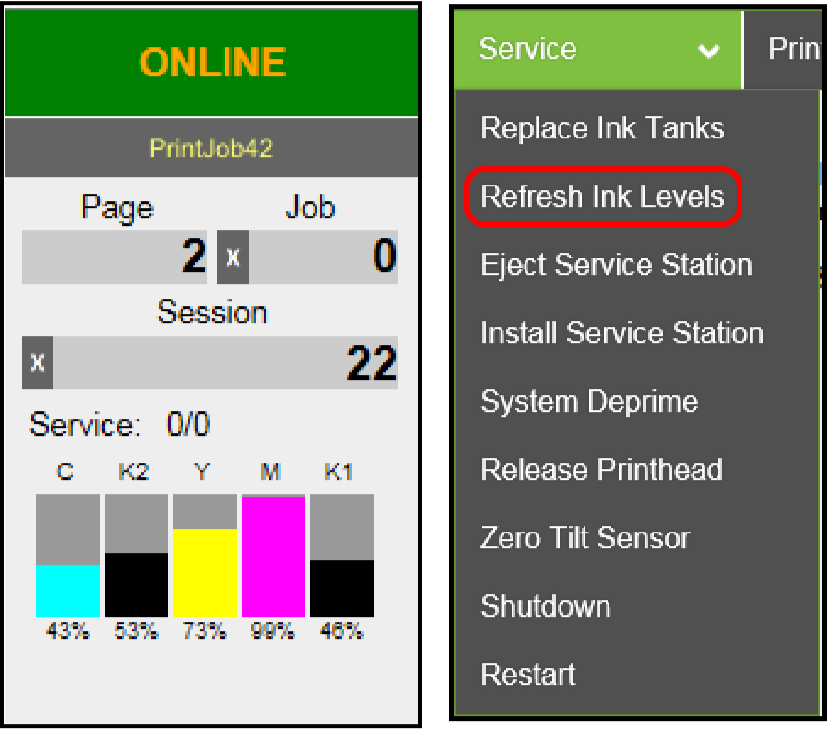
10. Watch the Toolbox screen on your computer. You should see all the ink colors fill-in; if all the Ink Tanks are properly installed and recognized. NOTE: The image at right shows used Ink Tanks installed. New Tanks should read 99%. Tip: If an Ink Tank color still does not fill in. Select the “Service” drop-down menu, then select “Refresh Ink Levels”. If the problem continues you may need to replace the Tank with a new Tank. Even new Ink Tanks can have dirty/corroded QA Chip contacts. This is not always visible to the eye. |
|
| 11. When the Printer stops processing and all the fields in System Status are black, the Printer is ready for use. | |
| 12. Close the Ink Tank Door. | |